

Last summer we did a “remodel” of our new villa in the USA. It was actually less of a remodel and more of a refresh, updating the 1990’s villa with fresh paint, tile, floors, countertop, appliances and design. We did this without any large construction or massive structural changes. We were able to do it all in 8 weeks for around $20K. We did everything last summer EXCEPT the master bathroom. We saved that for this summer – DIY Bathroom Remodel.

Arriving home from our world tour two months earlier than planned due to Covid, we launched almost immediately into our project of completely demolishing the old bathroom and beginning a DIY bathroom remodel – a 1993 bath becomes a 2020 showpiece.
DIY Bathroom Remodel
Given we were in no hurry and we wanted to save money, my husband tackled the entire job himself. We both were raised in do-it-yourself families, and we have had a lot of experience in this area. We have built two homes from the ground up and gutted and remodeled a third before taking on this Villa last summer. We kinda know what we are doing. So, here is what we did over a four month period to create the bathroom of our dreams.
Before
I’m sure in the early 1990’s this bathroom was pretty swanky. But nearly thirty years later it was out of date and worn out. Yes that is carpet you see in that photo. It was a thing in the 80’s and 90’s to put carpet in a bathroom. Not something I want anymore. So a complete demolition of this bathroom took place, creating a total clean slate to work with. We found someone on Facebook who came and took all the cabinets and sinks. The rest went to the dump.

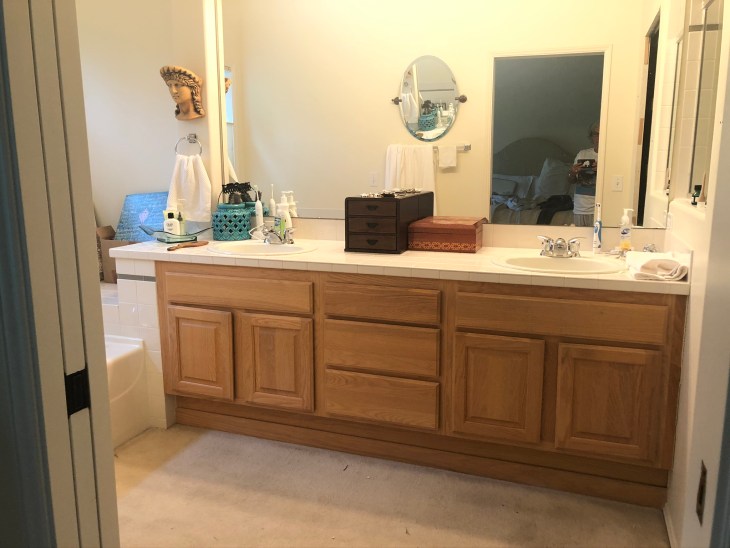

Before phone booth shower

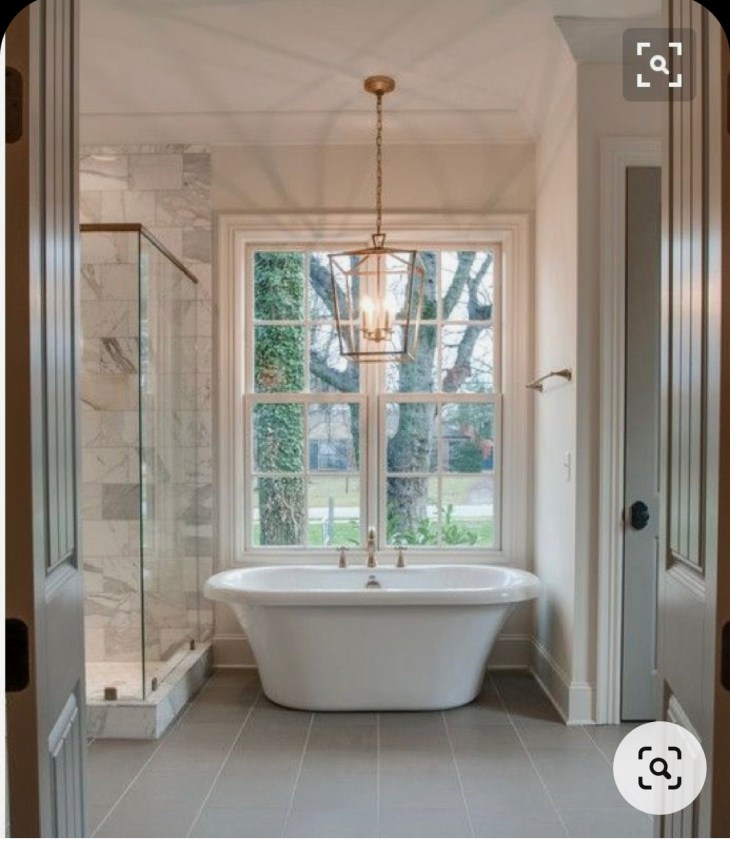
Inspiration
Thank you Pinterest for all these inspiring ideas for my DIY Bathroom Remodel…while we were still traveling I began to save lots of pins to my Home and Garden file in Pinterest of the kind of bathroom I imagined for this space. The bathroom is not huge, about 8 x 15 feet, but big enough for just the two of us. Here are some of my most inspiring photos from Pinterest that I used as we laid out the design for this bathroom. (Follow me on Pinterest!)


Framing, Plumbing and Electrical
Once demolition was complete my husband Arne began moving the plumbing. We moved the toilet about three feet, expanded the shower about four feet, moved the sink and changed the layout of the tub. Next a lot of time was spent framing the new shower and toilet cubby area where we had removed a wall and pocket door. He then did all the electrical adding some recessed lighting, chandelier and several new outlets.


Meanwhile Countertop Art
While Arne is doing all of this I am working with my friend and local concrete artist Laurie, as we begin to design a showpiece of a countertop as part of the DIY Bathroom Remodel. This is the second countertop Laurie has done for us. We worked closely together for three months on getting this beauty just right with the color and the texture that I wanted.
See Laurie’s work at Advanced Concrete and Design here.

Sheetrock and Paint
Once the plumbing and electrical was complete time to repair the sheet rock and paint. We used the same color paint we have used through out the rest of the house, a soft linen color by Behr called Authentic Tan.


Time to Start the Tile
Hands down the most time consuming and difficult task of all the bathroom remodel tasks the huge amount of tile in this bathroom was daunting. We purchased all the wall tile at Home Depot but made a special order for the magnificent floor tile from a local store called Advanced Flooring. We splurged a bit on the floor tile but the impact was worth it and we made up for it by using less expensive tile on the wall. By the way the wall tile is a larger style of subway tile that measures 12″.
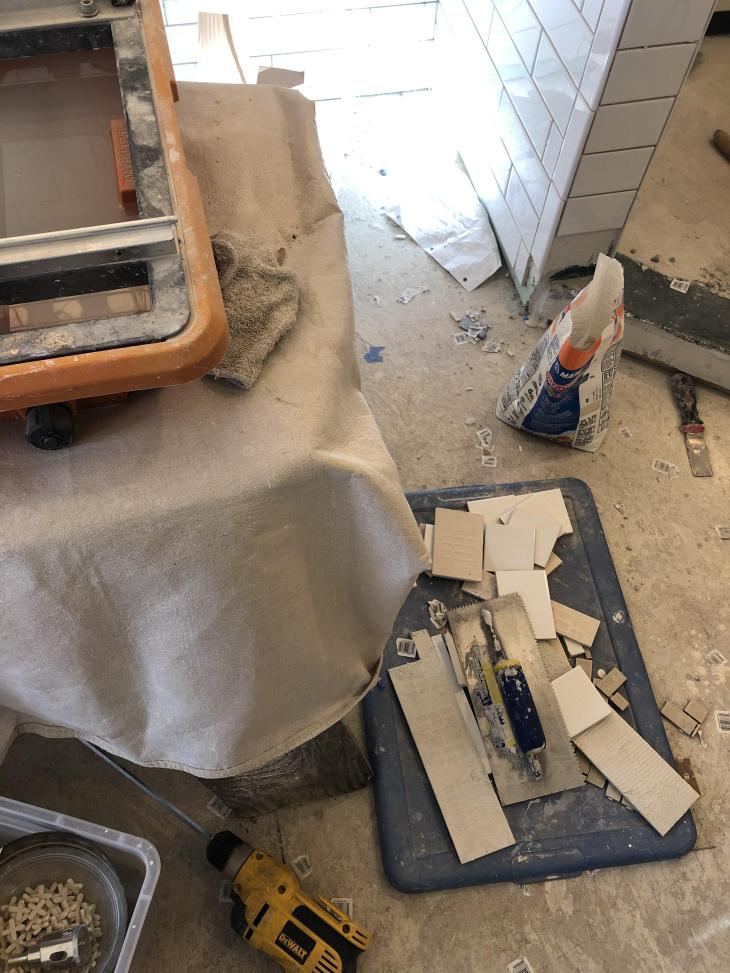

Arne borrowed his brother’s professional-grade tile cutter and got to work on this big job. Once again, taking his time was paramount in the success of this project. When we had other things to do, we did them. We took days off to hike, golf and play. We took two weeks off to do our Road Trip (see it all here). And pretty much every other minute he was placing tile. Occasionally when I would be working in other parts of the house a few choice words would burst from the project…but my husband persevered. He even built the pan for the new shower floor.


It Comes Together
Once the tile and grout were complete the beautiful tub was placed, and the vanity and toilet put in. All the plumbing fixtures in oil rubbed bronze came from Signature Hardware. The chandelier and light over the sink also went in. By the way, we ordered ALL OF THESE online to avoid going into the stores as much as possible due to the virus.

Finally Laurie arrived for the placement of the work-of-art countertop…after lots of work on her part and consultation on my part, the size, fit and color were absolutely perfect. The countertop weighs about 150 pounds and she was really nervous as we got it into place…but it went smoothly and we could not have been happier.

With the counter in place Arne finished the final tile pieces to finish off around the counter, and installed the faucet. Next we placed our beautiful mirror and added two small cabinets for more storage next to the tub and over the toilet.

One good scrub down of everything and then I began to decorate. Nearly every decorative item you see here I already owned, but I also added a few new and “new to me” pieces I had collected in the months coming up to this moment. I purchased all new towels and bath rugs and some storage bins. Finally, everything was complete exactly four months to the day from when we began the tear-out in May.
Pros and Cons
Doing a major DIY like this is NOT for everyone. Don’t tackle it unless you know what you are doing. But I know having a contractor come in and do all of this work would have cost us at least $50K. We did it for $14K.

The biggest con for me was the dust the project created throughout the house and the reaction I had to the dust in my allergies and sinuses. I am so grateful that part is over.
I absolutely love everything about this beautiful space now and how it flows both in color and function with the rest of our new home.
Although we have every intention of continuing to travel as soon as we can, knowing we have this space to call home when we are in the USA has been such a relief for us. So thankful we made the decision to buy this property and turn it into the retreat of our dreams. No regrets.
Some Final Before and After Shots and Decorative Touches. Enjoy.


Thanks for following along on this DIY Bathroom Remodel journey with us. We plan to relax for awhile now.
See this week’s top performing pin here.
We love it when you pin and share our blog.


4 Comments
Beautiful!
September 25, 2020 at 8:56 amAbsolutely Divine, and Inviting.
September 26, 2020 at 12:29 amThanks for breaking this down so clearly. Super helpful for DIYers like me.
April 19, 2025 at 9:31 pmWow, what an inspiring transformation! This DIY bathroom remodel truly showcases the power of vision and craftsmanship. The decision to move the toilet, expand the shower, and reconfigure the layout has completely modernized the space. I especially love the custom concrete countertop—it’s a stunning focal point that adds both artistry and functionality. The choice of soft linen paint and the elegant oil-rubbed bronze fixtures bring warmth and sophistication to the room. It’s amazing to see how thoughtful design and hard work can breathe new life into a space. This post is a fantastic resource for anyone considering a bathroom renovation.
September 28, 2025 at 7:49 pm